
Tuesday, June 26, 2012
Cinnamon Roll Waffles
Cinnamon Roll Waffles are very easy to make. On Sunday night when I didn't feel like cooking much, I made scrambled eggs to go along with these. All you do is pop open a can of cinnamon rolls (I used Phillsbury Cinnamon Rolls with Cinnabon flavor), spray a waffle iron, place them in, and cook them for a few minutes until golden brown...just like a waffle! When they are still warm, spread on top the icing glaze that comes in the can. If you want a quick dessert or a sweet breakfast side, then these are perfect.
Monday, June 25, 2012
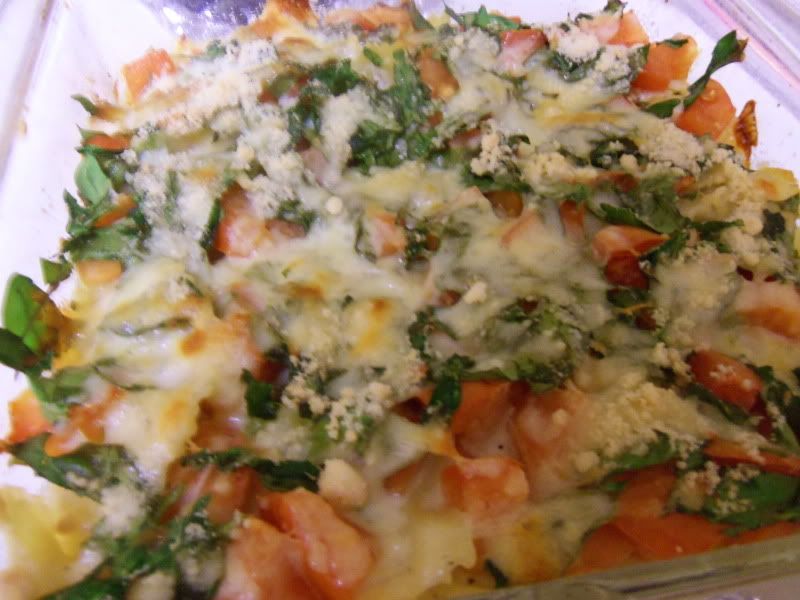
Original Creamy Garlic Layered Pasta Bake
I really wanted to make a simple pasta bake with a creamy sauce and vegetables, so I took the chance to create a recipe. Yes, this is an original. And you know those sauces that ask for heavy ingredients such as butter or half and half? Well this is your lucky day because this hardly has any of that, but it is still very tasty. I'll admit that this is now one of my favorite dishes, not because I made it up, even though I feel proud of coming up with it :)
Rachel Roy's Creamy Garlic Layered Pasta Bake
1/4 tsp minced garlic
1/2 Tbsp butter
1 3/4 C milk (I used 1%) (Put away 1/4 cup of it to use for later)
2 1/2 Tbsp flour
1/4 tsp salt
1/8 tsp pepper
1/2 tsp dried Italian Seasoning
1/8 tsp garlic powder
1/4 tsp dried basil
1/2 tsp lemon juice
2 1/2 C dried bow tie pasta
2 C Fresh Spinach
1 large round tomato
1 tsp olive oil
1/2 C shredded Mozzarella cheese
1/4 C crumbled Parmesan cheese
8x8 pan
2 sauce pans
Preheat oven to 375.
Bring enough water inside a sauce pan to a boil for the pasta. Add a pinch of salt, then the bow tie pasta.
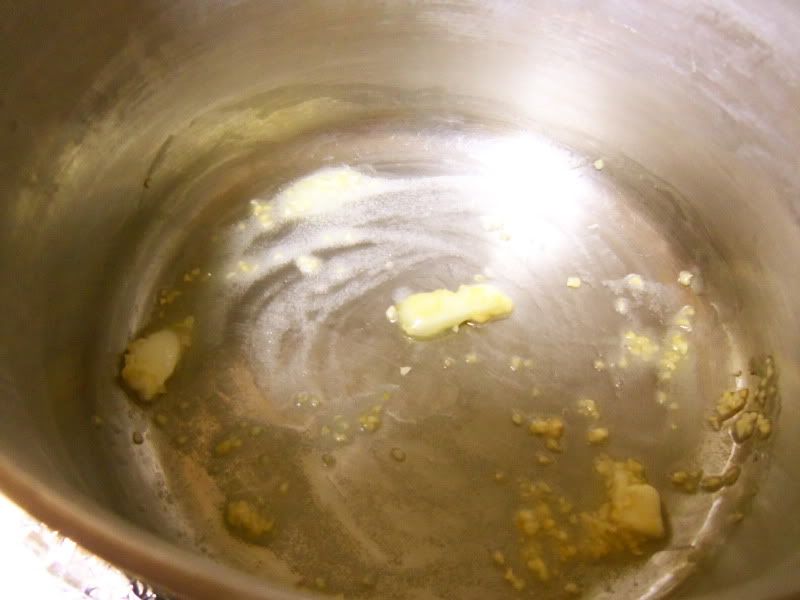
Cook butter (only 1/2 Tbsp) and minced garlic in another sauce pan over medium-high heat for 2 min, or until golden. Add 1 1/2 C milk. Whisk and cook for 1 minute to warm up.
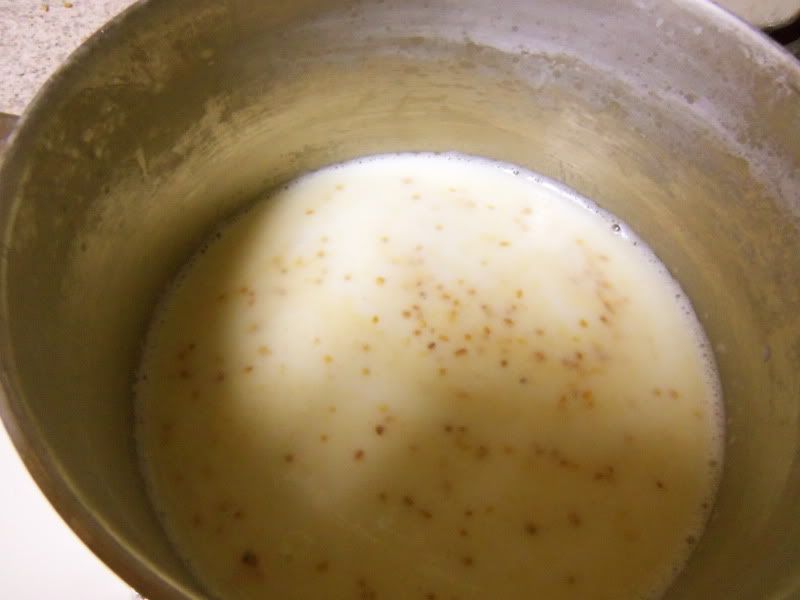 Add 2 1/2 Tbsp flour. Whisk to get clumps out, and reduce heat to medium.
 Add the salt, pepper, Italian Seasoning, garlic powder, basil, and lemon juice. When the sauce begins to thicken, add the remaining 1/4 C milk. Bring up heat to Med-high for a minute, then reduce to med-low.

Once the pasta is tender, drain. Once the sauce is thick enough, add it to the pasta mixture and stir to combine.
Roughly chop the spinach and the tomato. Shred the mozzarella if not already.
Coat an 8x8 pan with the 1 tsp olive oil. Layer the creamy pasta, then the tomato pieces, then the spinach. Top with cheeses.


Place into the oven and bake at 375 for 30 minutes. Voila!
Rachel Roy's Creamy Garlic Layered Pasta Bake
1/4 tsp minced garlic
1/2 Tbsp butter
1 3/4 C milk (I used 1%) (Put away 1/4 cup of it to use for later)
2 1/2 Tbsp flour
1/4 tsp salt
1/8 tsp pepper
1/2 tsp dried Italian Seasoning
1/8 tsp garlic powder
1/4 tsp dried basil
1/2 tsp lemon juice
2 1/2 C dried bow tie pasta
2 C Fresh Spinach
1 large round tomato
1 tsp olive oil
1/2 C shredded Mozzarella cheese
1/4 C crumbled Parmesan cheese
8x8 pan
2 sauce pans
Preheat oven to 375.
Bring enough water inside a sauce pan to a boil for the pasta. Add a pinch of salt, then the bow tie pasta.
Cook butter (only 1/2 Tbsp) and minced garlic in another sauce pan over medium-high heat for 2 min, or until golden. Add 1 1/2 C milk. Whisk and cook for 1 minute to warm up.
Once the pasta is tender, drain. Once the sauce is thick enough, add it to the pasta mixture and stir to combine.
Roughly chop the spinach and the tomato. Shred the mozzarella if not already.
Coat an 8x8 pan with the 1 tsp olive oil. Layer the creamy pasta, then the tomato pieces, then the spinach. Top with cheeses.
Place into the oven and bake at 375 for 30 minutes. Voila!
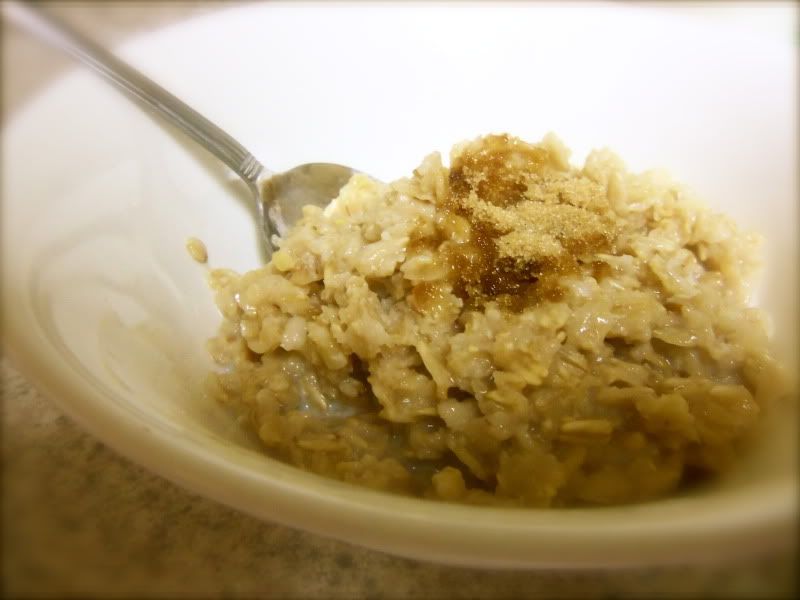
Maple Walnut Oatmeal
One of my favorite breakfast dishes is this Oatmeal recipe. I originally used a recipe from Cooking for Two, but didn't like how sweet it was, so I adjusted it a bit into my own version. I know that many people don't like nuts, which is why the walnuts are completely crushed to add some Omega 3s, protein, and flavor.
Maple Walnut Oatmeal
(This is for one serving. You can increase each amount for the amount of people you are making this for):
1 cup water
pinch of salt
pinch of salt
1/2 dried rolled oats (not instant)
1/4 cup walnuts
1 tbsp maple syrup
up to 1 tbsp brown sugar
Place walnuts inside a large ziploc bag and completely crush them into a powder form. You can do this with a rolling pin.
Bring water to a boil with the salt, then add oatmeal and reduce heat to medium. Cook for two minutes.
Stir in maple syrup, cook for 1 minute, then add walnut powder. Stir and cook for another 2 minutes or until the water is evaporated.
Place into a bowl, serve with milk and top with brown sugar.
Baked Apple Chips
This baked apple chips recipe is easy enough to make, and they can be eaten as a healthy snack or to top on top of a salad. All you need:
2 apples
cinnamon
First cut out the core of the apple. If you can somehow pull it out without ruining the rest of the apple, then go for it! I gave up on that part, so I cut the apple into four pieces around the core.
Peel off remaining peels, but you can leave some for extra nutrients
Preheat oven to 275.
Line cookie sheet with aluminum foil and lay apples on top, as a single layer.
Sprinkle a little cinnamon on top.
Bake for 2 hours, then flip halfway through so they cook evenly. Enjoy!!
Saturday, June 9, 2012
Taco Quesadillas
Today I wanted to use up some ingredients, and I couldn't decide between having tacos or quesadillas (oh the problems we face today). So then I had the idea...why not make a taco quesadilla? It worked! I am also picky about my food staying warm, and I get peeved when my tortilla is cold and the filling is hot, and if it's too soft it falls apart. In this case, you don't have to worry. The tortilla is both soft but with a little crisp.
All you need to do for a taco quesadilla is make the taco meat and chop the fillings as you normally would . I used a taco seasoning mix to keep it easy and filled up the quesadilla with tomatoes, cheese, green pepper (which I was unsure about at first, but it tasted great), and the hamburger inside a tortilla (I used whole wheat.)
Taco Quesadillas
 Close it up and cook it on a skillet or a mini grill.

All you need to do for a taco quesadilla is make the taco meat and chop the fillings as you normally would . I used a taco seasoning mix to keep it easy and filled up the quesadilla with tomatoes, cheese, green pepper (which I was unsure about at first, but it tasted great), and the hamburger inside a tortilla (I used whole wheat.)
Taco Quesadillas
Serve it with desired sides, whether it be lettuce and tomato, sour cream, rice, guacamole...you name it. Call it a quick, easy meal (I had 2 because they were that good.)
Clam Chowder and Garlic Cheese Biscuits
This clam chowder was another from a cookbook that I have. It is very delicious! However, I learned the hard way: it makes a lot. I should have taken the note when the writer said it's her favorite to serve around Christmas time. So I suggest that you cut it in half, unless you are feeding over 6 people.

Clam Chowder
Garlic Cheese Biscuits (from The Girl Who Ate Everything):
Combine Bisquick with cold butter in a medium bowl using a pastry cutter (I just used 2 forks). Don't worry about mixing too thoroughly; there will be small chunks of butter in the mix about the size of peas. Add cheddar cheese, milk, and garlic powder. Mix by hand until combined, but don't over mix.
Drop 1/4 cup portions of the dough onto the lightly greased or parchment lined cookie sheet. Bake for 11-13 minutes in preheated oven or until the tops of the biscuits begin to turn light brown.
While the biscuits are baking, melt butter is a small bowl in the microwave. Stir in garlic powder and dried parsley flakes. Use a brush to spread the garlic butter over the tops of all the biscuits. Sprinkle a little kosher salt on the freshly coated biscuits. Makes one dozen.
Anyways, here is the recipe. I adjusted it a bit from the book so here it goes:
Clam Chowder
2 to 3 cans minced clams
1 C onion, chopped
1 C celery, diced
2 C potato, peeled and diced
3/4 C butter
3/4 C flour
1 qt half and half (I used fat-free, which worked completely fine once I added about another 3 Tbsp of butter to keep it creamy)
1 tsp salt
1/2 tsp garlic salt
1 1/2 tsp pepper (if you like it a little spicy. If you don't, then you can cut it down. I personally liked this much pepper because I'm usually up for a mild flavor kick.)
Add vegetables to a large stockpot. Open cans of clams and pour in the juice with the vegetables, reserving the clams, then add enough water to barely cover. Bring vegetables to a boil over medium-high heat. Turn down heat and simmer over medium-low heat until vegetables are tender, about 15 minutes.
In a heavy saucepan, melt butter. Add flour and stir until smooth. Cook for about 1 minute. Slowly add half and half, constantly stirring with a wire whisk until thick and smooth, making a white sauce. Add white sauce to vegetable mixture and stir to combine. Stir in salt, pepper, and clams. Heat through and serve. Adding clams at the last minute keeps them tender instead of chewy. Serve in bread bowls or with garlic cheese biscuits. I actually used the garlic cheese biscuit recipe from the back of the Bisquick box, but there is also this one, which involves more butter and cheese:
Garlic Cheese Biscuits (from The Girl Who Ate Everything):
Cheddar Bay Biscuits
Biscuits:
2 1/2 cups Bisquick
4 Tbsp cold butter
1 cup cheddar cheese, shredded
3/4 cup milk
1/4 tsp garlic powder
Butter Glaze:
3 Tbsp butter
1/2 tsp garlic powder
3/4 tsp dried parsley flakes
Preheat your oven to 400 degrees. Lightly grease or line one cookie sheet with parchment; set aside.
Drop 1/4 cup portions of the dough onto the lightly greased or parchment lined cookie sheet. Bake for 11-13 minutes in preheated oven or until the tops of the biscuits begin to turn light brown.
While the biscuits are baking, melt butter is a small bowl in the microwave. Stir in garlic powder and dried parsley flakes. Use a brush to spread the garlic butter over the tops of all the biscuits. Sprinkle a little kosher salt on the freshly coated biscuits. Makes one dozen.
Tuesday, June 5, 2012
(The Easiest) Chicken Cordon Bleu
This recipe is incredible, and it tastes like something you would eat at a nice restaurant. What's better? It only took about 5 minutes to prepare. That's it! On top of that, it wasn't messy. There are other recipes out there that are breaded and can be a pain to make, but you don't' have to worry about that or using a meat pounder with this version. It's different, but simple and delicious. This must be the easiest chicken cordon bleu recipe you will ever see.
Chicken Cordon Bleu
Preheat oven to 400.
Butterfly each chicken breast, meaning cut it lengthwise.

Place a couple of thin slices of ham and a slice of provolone cheese inside each chicken breast.


Chicken Cordon Bleu
Preheat oven to 400.
Butterfly each chicken breast, meaning cut it lengthwise.

Place a couple of thin slices of ham and a slice of provolone cheese inside each chicken breast.

Fold over each chicken, and you can cut off the excess ham and cheese sticking out so it doesn't get messy or burn

Sprinkle each chicken breast with bread crumbs, salt, pepper, dried minced onion, and parsley, then top with one or two lemon slices. You can add spices on top of the lemons, too.
Place in the oven and bake for 20-45 minutes. It will depend on your oven, because the recipe said 15-20 minutes, but it took me about 40.

Ta da! Tastes great with roasted asparagus on the side.
Maple Pecan Chicken
I was looking through my cookbooks for an easy, new chicken recipe. I came across this one. It sounded interesting, and at first I was unsure about it, but I gave it a shot. It doesn't have many ingredients, is easy, and delicious.
2 Tbsp mayonnaise
1/4 C maple syrup
1/2 tsp salt
3/4 C panko bread crumbs (I used normal bread crumbs)
1/2 C very-finely chopped pecans
4 boneless, skinless chicken breasts (you can pound to 1/2 inch thick so it cooks faster, otherwise it will be fine but will take longer)
Heat oven to 400. Mix mayonnaise, maple syrup, and salt in a shallow dish. In another dish, mix bread crumbs and pecans. Dip chicken into syrup mixture, then into bread crumbs. Place on a greased baking sheet. Spray top of chicken with cooking spray. Bake for 15 to 20 minutes, turning once, until done and coating is brown. Makes 4 servings.
Crock Pot Applesauce
I usually hate applesauce. Literally, for about 8 years, I ate applesauce for every single meal and snack to take my digestive enzymes for Cystic Fibrosis, since I hadn't learned how to swallow pills at that time. I would break open the capsules and put the small, what I called "bebe's." Once I learned how to swallow pills, I never went back to applesauce.

Years later I tried chunky applesauce, which wasn't as bad. I could handle apple sauce cooked in things, but that was it.
However, when I saw this recipe on Pinterest, I figured that homemade, chunky applesauce wouldn't be as bad as the disgusting texture and taste of normal applesauce. It was absolutely delicious, can freeze well, doesn't have a lot of ingredients, and is easy to make. Here is the recipe (from http://www.skinnytaste.com/2011/10/crock-pot-applesauce.html):

Crock Pot Applesauce
- 8 medium apples (Use a combination of Golden Delicious, Honey Crisp, Fuji, Gala, etc.)
- 1 strips of lemon peel - use a vegetable peeler
- 1 tsp fresh lemon juice
- 3 inch cinnamon stick
- 5 tsp light brown sugar (unpacked) - or agave (however, I cut it down to about 2 1/2 tsp and it was just fine)
Peel, core, and slice the apples. I used a veggie peeler and then a round apple divider cutter
Place in a slow cooker. Add cinnamon stick, lemon peel and brown sugar.
Set crock pot on low for 6 hours. Stir apples occasionally, as the apples will slowly become a delicious applesauce. Remove cinnamon stick and blend if you prefer a creamier sauce, otherwise you can slightly smash them with a spoon for a chunky sauce.
Then bam. Deliciousness. You can eat it with potato pancakes, with sausage, or just by itself as a healthy snack.
Sunday, June 3, 2012
Chili-Lime Steak
I decided to try a new steak recipe. I'll be honest, I didn't like it as much as my mom's recipe for the steak marinade (which I'll post later once I get the chance to make it), but this was still delicious. I believe that it would be the perfect steak to put inside quesadillas or as steak tacos. I used the Our best bites recipe, but ended up marinating it in Italian dressing first before putting it on the grill. You don't have to marinade it in dressing if you think that's weird to mix the two (somewhat) Italian and Southwestern tastes together, but it made it more tender with extra flavor. I think that next time I will eliminate the dressing, as it was just an experiment. After grilling the steak, I added pineapple on the grill and then topped it onto the steak.
Chili Lime steak
1-2 lbs boneless steak (since I cook for one person, I used one steak and cut the other ingredients in half.)
Rub:
1 tsp chili powder
1 tsp granulated garlic
1/2 tsp cumin
1/2 tsp coriander
1/2 tsp oregano
1/8-1/4 tsp cayenne pepper
3/4 tsp kosher salt
1/4 tsp freshly ground black pepper
1 lime, juiced (about 2 tablespoons lime juice)
1 Tbsp extra-virgin olive oil
*Our Best Bites says that for a smoky rub, chipotle chili powder may be substituted for cayenne pepper
If you'd like, marinate each steak in 1/4 cup Italian dressing in a large ziploc bag for 15 minutes while preparing the run
1. For the rub, combine spices in a small bowl. Add lime juice and olive oil and stir to combine.
2. Place the steak in a shallow dish (such as a 9x13 inch baking dish). Pour the spice mixture over the steak and then rub it with your hands. Allow the steak to stand for 15 minutes. While the meat is standing, preheat your grill.
3. Place the steak on the grill over medium-high heat and cook for 5-7 minutes per side or until desired doneness is reached. Remove from grill and allow to stand for 5 minutes before slicing.
4. If you'd like to use the steak in other dishes, slice against the grain into strips about 1/4 inch thick
You can serve with sweet potato fries, as I did. I will post that recipe later on.
 |
| I know, the picture may look weird as my camera isn't the best quality, but that's the grilled pineapple on top, which I highly recommend! |
Chili Lime steak
1-2 lbs boneless steak (since I cook for one person, I used one steak and cut the other ingredients in half.)
Rub:
1 tsp chili powder
1 tsp granulated garlic
1/2 tsp cumin
1/2 tsp coriander
1/2 tsp oregano
1/8-1/4 tsp cayenne pepper
3/4 tsp kosher salt
1/4 tsp freshly ground black pepper
1 lime, juiced (about 2 tablespoons lime juice)
1 Tbsp extra-virgin olive oil
*Our Best Bites says that for a smoky rub, chipotle chili powder may be substituted for cayenne pepper
If you'd like, marinate each steak in 1/4 cup Italian dressing in a large ziploc bag for 15 minutes while preparing the run
1. For the rub, combine spices in a small bowl. Add lime juice and olive oil and stir to combine.
2. Place the steak in a shallow dish (such as a 9x13 inch baking dish). Pour the spice mixture over the steak and then rub it with your hands. Allow the steak to stand for 15 minutes. While the meat is standing, preheat your grill.
3. Place the steak on the grill over medium-high heat and cook for 5-7 minutes per side or until desired doneness is reached. Remove from grill and allow to stand for 5 minutes before slicing.
4. If you'd like to use the steak in other dishes, slice against the grain into strips about 1/4 inch thick
You can serve with sweet potato fries, as I did. I will post that recipe later on.
Friday, June 1, 2012
Homemade Pizza
I have had a goal for a while to make a real, homemade pizza. Let me tell you, it was worth it making the dough and the sauce. I have used my mini George Foreman grill for a few grilled pizzas, which are also delicious (link on how to grill a pizza is posted below), but I wanted to make a larger one where the dough needed to rise before putting in the oven.
Homemade Pizza
Pizza dough recipe is from Annie's Eats and the directions are from http://italianfood.about.com/od/breadspizza/a/aa042205_2.htm (Because it has a more thorough explanation on how to make it, especially if you are using a metal pizza pan or cookie sheet.) :
the sauce is from Our Best Bites
Basic Pizza Dough
Ingredients:
½ cup warm water (about 110°)
1 envelope (2 ¼ tsp.) instant yeast
1 ¼ cups water, at room temperature
2 tbsp. extra-virgin olive oil
4 cups (22 oz.) bread flour, plus more for dusting
1 ½ tsp. salt
olive oil or non-stick cooking spray for greasing the bowl
Begin by dissolving the yeast in the water, in a large mixing bowl; let it stand for 5 minutes. Add the remaining ingredients and mix, either by hand or with a mixer set to low speed, until the ingredients are blended. Now hand-knead the dough or mix it with a dough hook setting the speed to low for about 10 minutes, or until the dough is smooth and elastic. Coat the insides of another bowl with olive oil and turn the dough in it to coat it too, then cover with plastic wrap and set it in a warm place to rise for an hour, or until it doubles in volume.
For the baking, if you have a wood-fired pizza oven, fire it up. If you are instead using your kitchen oven, preheat it to 475 F (250 C) -- if you are using a baking stone it should heat for at least 45 minutes. Otherwise grease and dust two flat baking sheets with corn meal. Divide the dough in half, shape each half into a ball and let them sit for 15 minutes. Then shape them into disks, stretching them out from the center on a floured surface. Do not roll them, because rolling toughens the dough.
You are now ready to assemble the pizzas: Ladle and spread a half cup or so of tomato sauce or chopped canned tomatoes over the disks, leaving an inch of sauce-free rim, add the toppings (see next page), and bake.
If you're using a baking stone and have a baker's peel (a thin metal disk with a handle), lightly flour it, slide the pizza onto it, and transfer it to the stone with a deft yank -- the flour will keep the dough from sticking. If you don't have a peel, use a flat cookie sheet instead, lightly flouring it, to transfer the pizza from the work surface to the stone.
If you're using a metal baking pan you should bake the pizza towards the bottom of the oven. In a recent post to Rec.Foods.Cooking Karen suggested baking on the bottom rack for about 4 minutes, or until the pizza is firm enough to slide off the pan, and then slide it from the pan straight onto the rack to finish cooking.
The pizza will in any case be done when the crust is browned and the toppings are cooked; this takes 3 minutes in a wood-fired oven and about 15 at home. If you discover that the mozzarella begins to brown before the other ingredients are cooked to your satisfaction, the next time add it after the pizza (with the other toppings) has baked for about 5 minutes.
Having said all this, once you have your dough, what to do with it? The standard topping combinations one encounters in Italy differ somewhat from those I have encountered elsewhere. The quantities given on the next page will be sufficient for one pizza each, so if you make the dough given above you will need to double the amounts, or select two.
Pizza Sauce:
1 6-oz. can tomato paste
6 oz. water (just use the empty tomato paste can)
3 Tbsp. garlic bread seasoning
1 Tbsp. sugar or honey (I usually use sugar because it’s easier and hey, I think we’ve established here that if there’s an easy road or a hard road, I usually take the easy road…)
3/4 tsp. onion powder
1/4 tsp. red pepper flakes (optional)
Empty tomato paste into a bowl and add water a few tablespoons at a time, stirring constantly until combined. Add remaining ingredients, stir to combine, and allow to stand until ready to use. Covers two average-sized pizza; freezes extremely well.
For the toppings, I split up the pizza into different parts to add some variety. It's just an idea but it made it better :)
Also, here is the tutorial for a grilled pizza: (Again, I just use my George Foreman grill. I spread olive
oil on the grill and then put on the dough, I close the lid,
then put on the toppings, then put the lid down
once again. Don't worry, the toppings come off the grill's lid very
easily.)
 |
| stretching out the dough is one of the harder steps, but as the directions read, don't use a rolling pin because it will toughen up too much. Just be sure to get it as even as possible so it doesn't tear up once it is ready to eat |
 |
| the pizza sauce |
 |
| about to be put into the oven |
 |
| ta da!! Also, a grilled pizza can look something like this (This one in particular is BBQ chicken topped with tomatoes and bell peppers):  |
Subscribe to:
Posts (Atom)